Application guide / fresh concrete

Colour that becomes part of the floor.

Colour built into fresh concrete. A dry-shake mineral surface hardener for durable residential, commercial and industrial floors, indoors and outdoors.

Explore the application Plan your quantities
Broadcasting INCISE Colour Hardener onto fresh concrete
The right material. At the right moment.

Fresh concrete, not a dry floor.

Use this guide with the current INCISE Colour Hardener TDS and approved slab specification. Agree the colour, texture, application rate, joint layout and protection system before pouring. Make a representative sample. This guide covers fresh concrete; it is not an overlay method for cured floors.

Apply after surface bleed water has disappeared, while the concrete remains moist and receptive. Do not wait 28 days to apply the dry shake: 25 MPa refers to the designed concrete strength at 28 days.
20 kg buckets / measured by area

Know your quantity before you cast.

Residential / pedestrian3 kg/m²6.67 m² per bucket

Broadcast split: 1.8 + 1.2 kg/m²

Retail / commercial4 kg/m²5 m² per bucket

Broadcast split: 2.4 + 1.6 kg/m²

Heavy industrial5 kg/m²4 m² per bucket

Broadcast split: 3.0 + 2.0 kg/m²

Approximate coverage before wastage. First broadcast 60%, then the remaining 40%. No polymer mixing for this method.

Tools to have ready

Concrete placing and compaction equipment; straightedge and level; bull float; scales, area markers and dry-shake scoop or spreader; hand trowels or power float; joint-cutting equipment; curing equipment; densifier applicator; short-nap sealer roller. Use gloves, goggles, boots and suitable dust protection.

From placement to protection

Every stage has its moment.

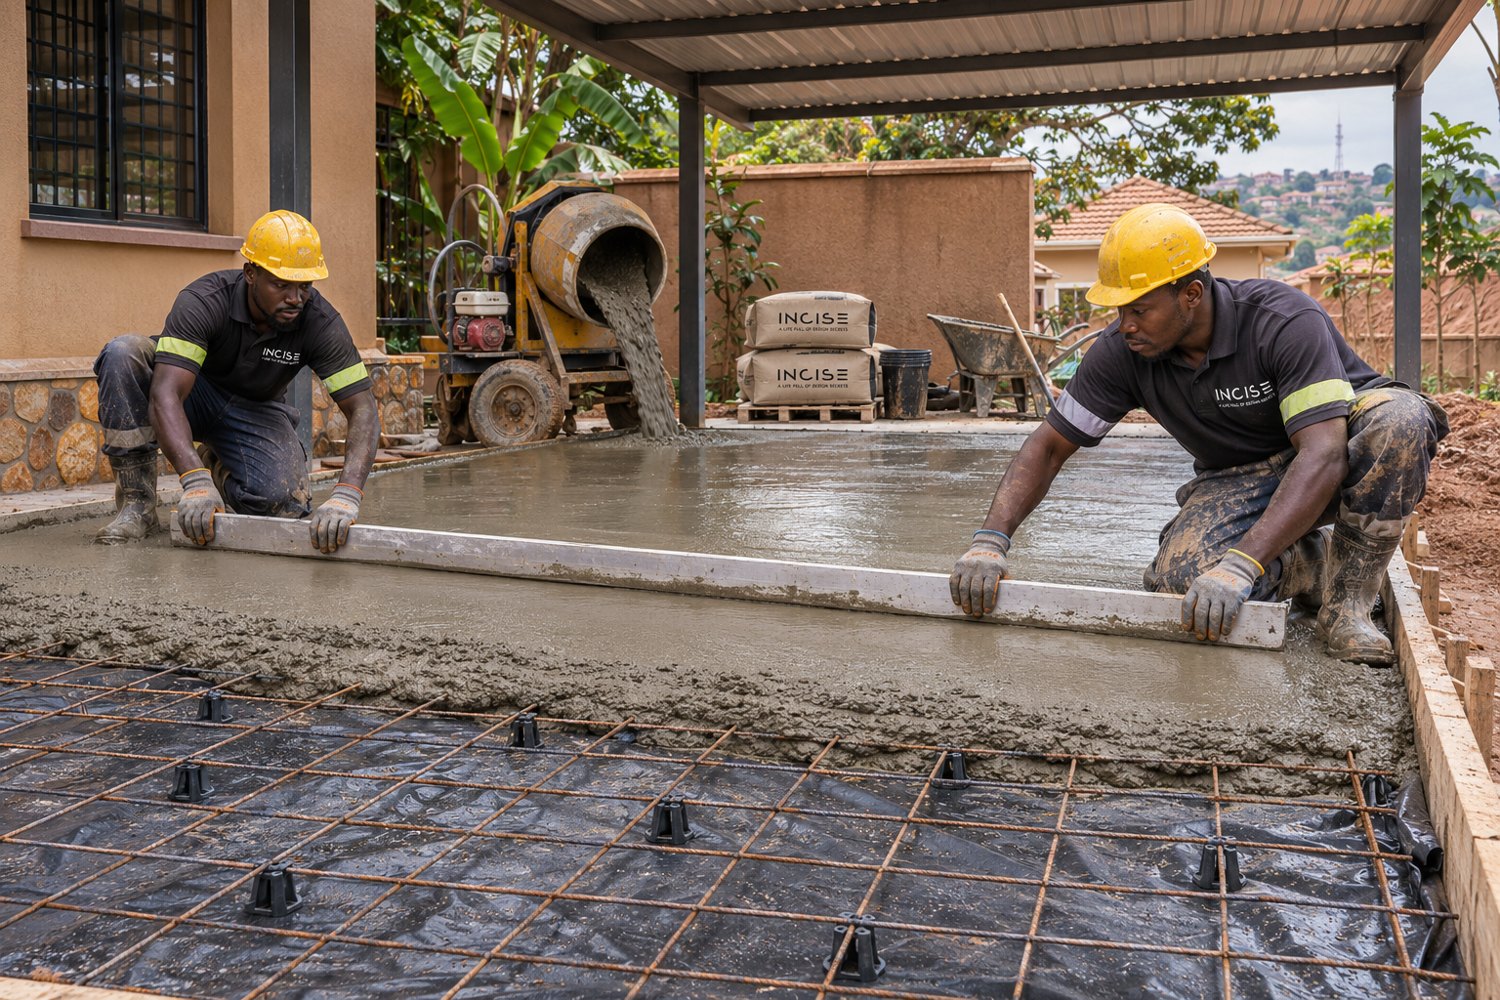
Concrete placement with supported reinforcement and membrane
01
Before casting

Plan the slab before the pour

Prepare and compact the supporting base to the slab design. Install the specified membrane with sealed laps and protected penetrations. Support reinforcing mesh or bars on suitable chairs to maintain the designed concrete cover. Set forms, levels, falls and planned joints.

Application detail

Use concrete designed to achieve at least 25 MPa at 28 days. The engineer determines slab thickness, reinforcement and loading requirements. Agree a concrete mix compatible with dry-shake finishing and consistent deliveries.

Before moving on: The base, reinforcement, membrane, falls and joint plan are accepted before concrete arrives.
Concrete placement with supported reinforcement and membrane
02
Fresh concrete

Cast, compact and level

Place the concrete, compact it correctly and strike it to the required level. Work in manageable bays with the placing and finishing teams coordinated. Remove low spots and high ridges during placement.

Application detail

Do not add uncontrolled water to concrete on site. Keep the surface open for dry-shake incorporation; do not polish or seal it prematurely. Protect the pour from rain, strong wind and rapid drying.

Before moving on: A level, well-compacted slab with a consistent fresh surface.

Broadcasting INCISE Colour Hardener onto fresh concrete
03
No standing bleed water

Wait for the right moment

Allow surface bleed water to disappear. The concrete must still be plastic and moist enough for the hardener to draw moisture from within the slab, but firm enough for the planned finishing method.

Application detail

Read the slab, not only the clock. Temperature, wind, mix and bay size change the working window. Do not broadcast into puddles or onto concrete that has dried or set. Do not use dry hardener to soak up bleed water.

Before moving on: No free water on the surface; concrete still receptive to the dry shake.

Broadcasting INCISE Colour Hardener onto fresh concrete
04
Measure by area

Broadcast the first 60%

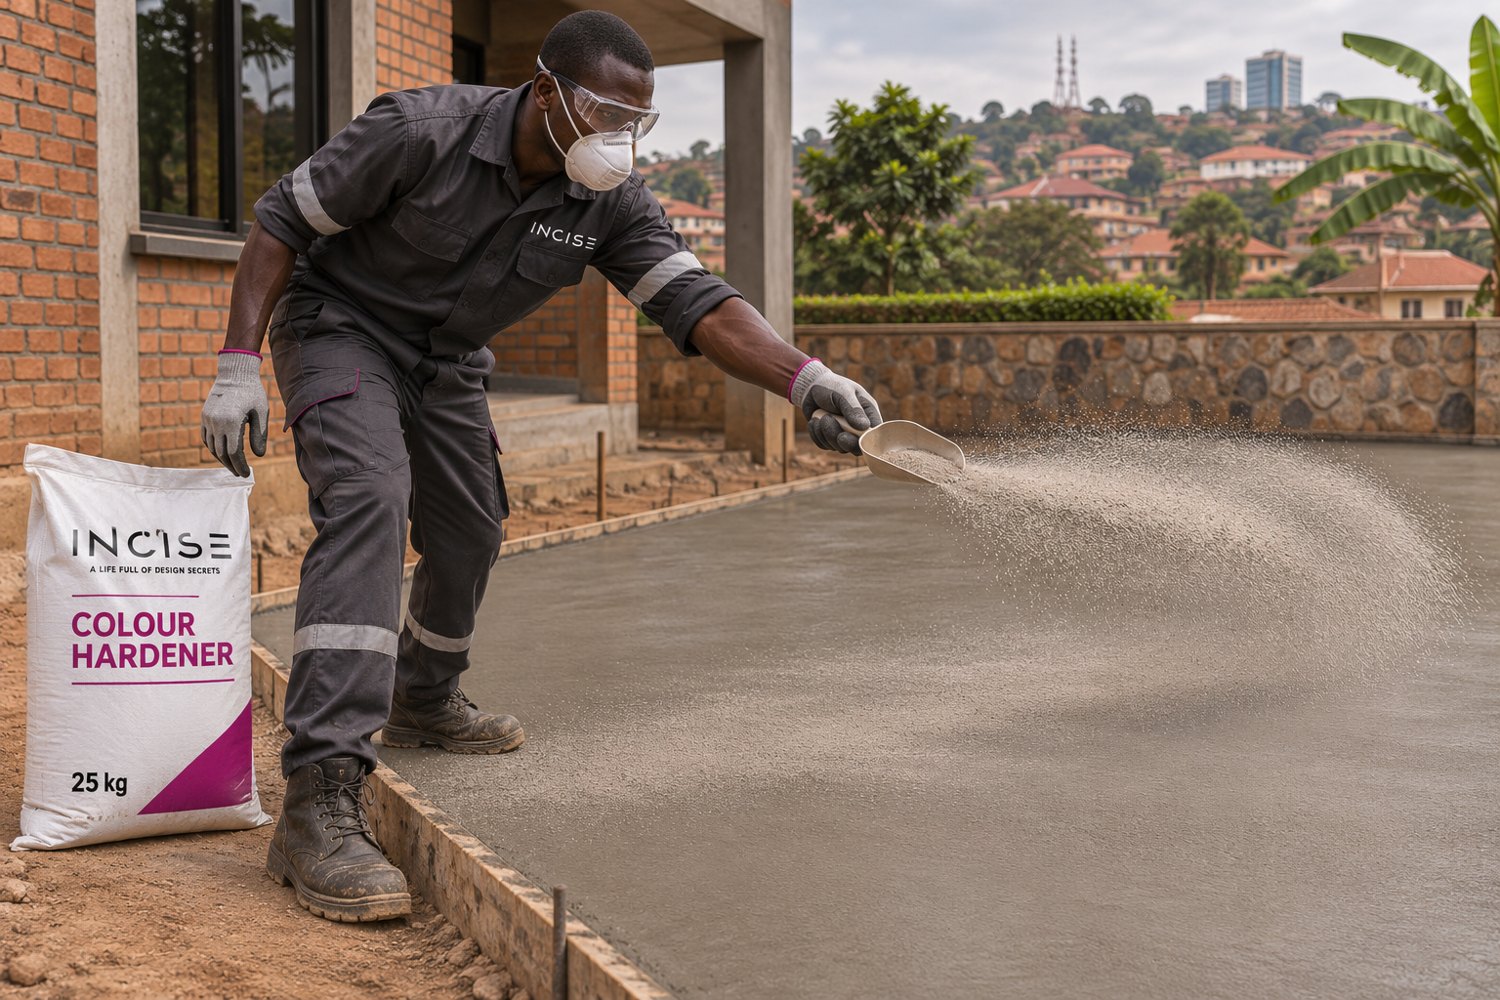
Weigh out the specified quantity for each marked bay. Broadcast approximately 60% evenly in a low, controlled spreading motion. Avoid piles, missed areas and throwing material so hard that it disturbs the surface.

Application detail

Let the powder absorb moisture and darken before floating it into the surface. Do not premix the hardener with polymer or water for this dry-shake method. Do not sprinkle water on top to force wetting.

Before moving on: The first addition is evenly moistened and ready to be incorporated.

Floating the dampened dry shake into concrete
05
Remaining 40%

Float in, then add the balance

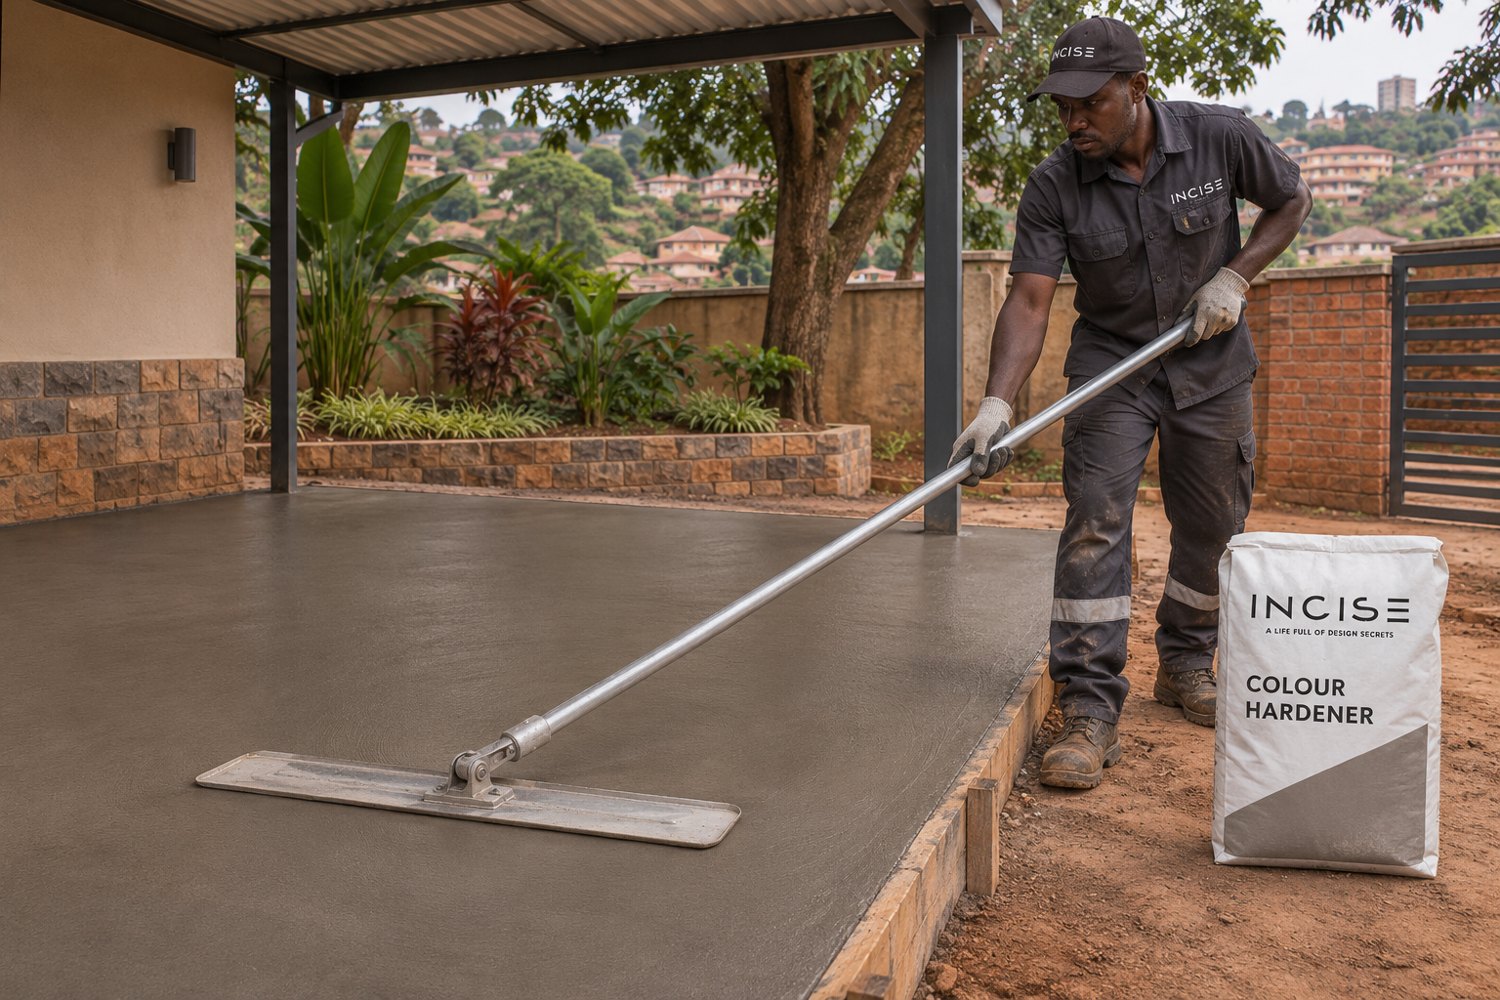
Float the first addition into the concrete. Apply the remaining 40% evenly, preferably across the direction of the first broadcast, to complete the specified total application rate.

Application detail

Allow the second addition to darken with absorbed moisture, then float it into the slab. Pay attention to edges and colour uniformity. Two additions form one integrated surface treatment, not two separately cured coats.

Before moving on: The full measured quantity is incorporated without dry pockets or loose powder.

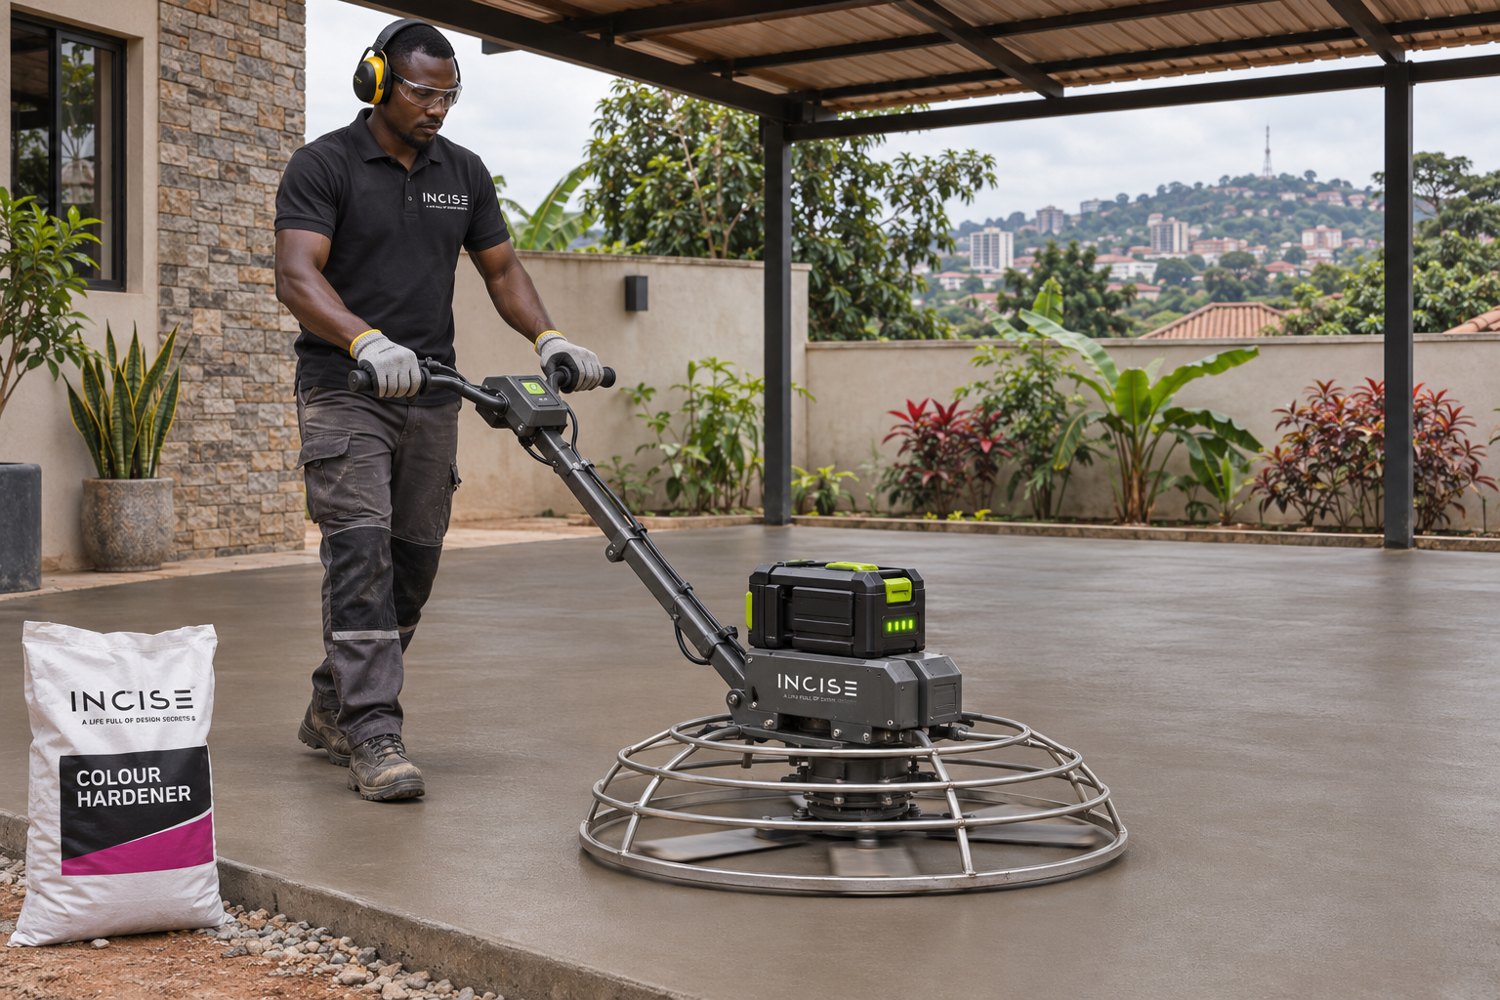
Power floating colour hardened concrete
06
Hand or machine finishing

Create the approved finish

As the surface firms, finish with a steel trowel or suitable power-floating machine. Use a trained operator and controlled passes to achieve a dense, even finish without tearing the surface.

Application detail

Avoid excessive polishing and added water. Select a texture appropriate to the location: smooth surfaces require slip-resistance consideration where wet. For stamped concrete, follow the separately approved release-agent and stamping sequence while the slab is workable.

Before moving on: The finish matches the sample, with sound edges and no overworked patches.

Cutting contraction joints in colour hardened concrete
07
Protect hydration

Form joints and cure

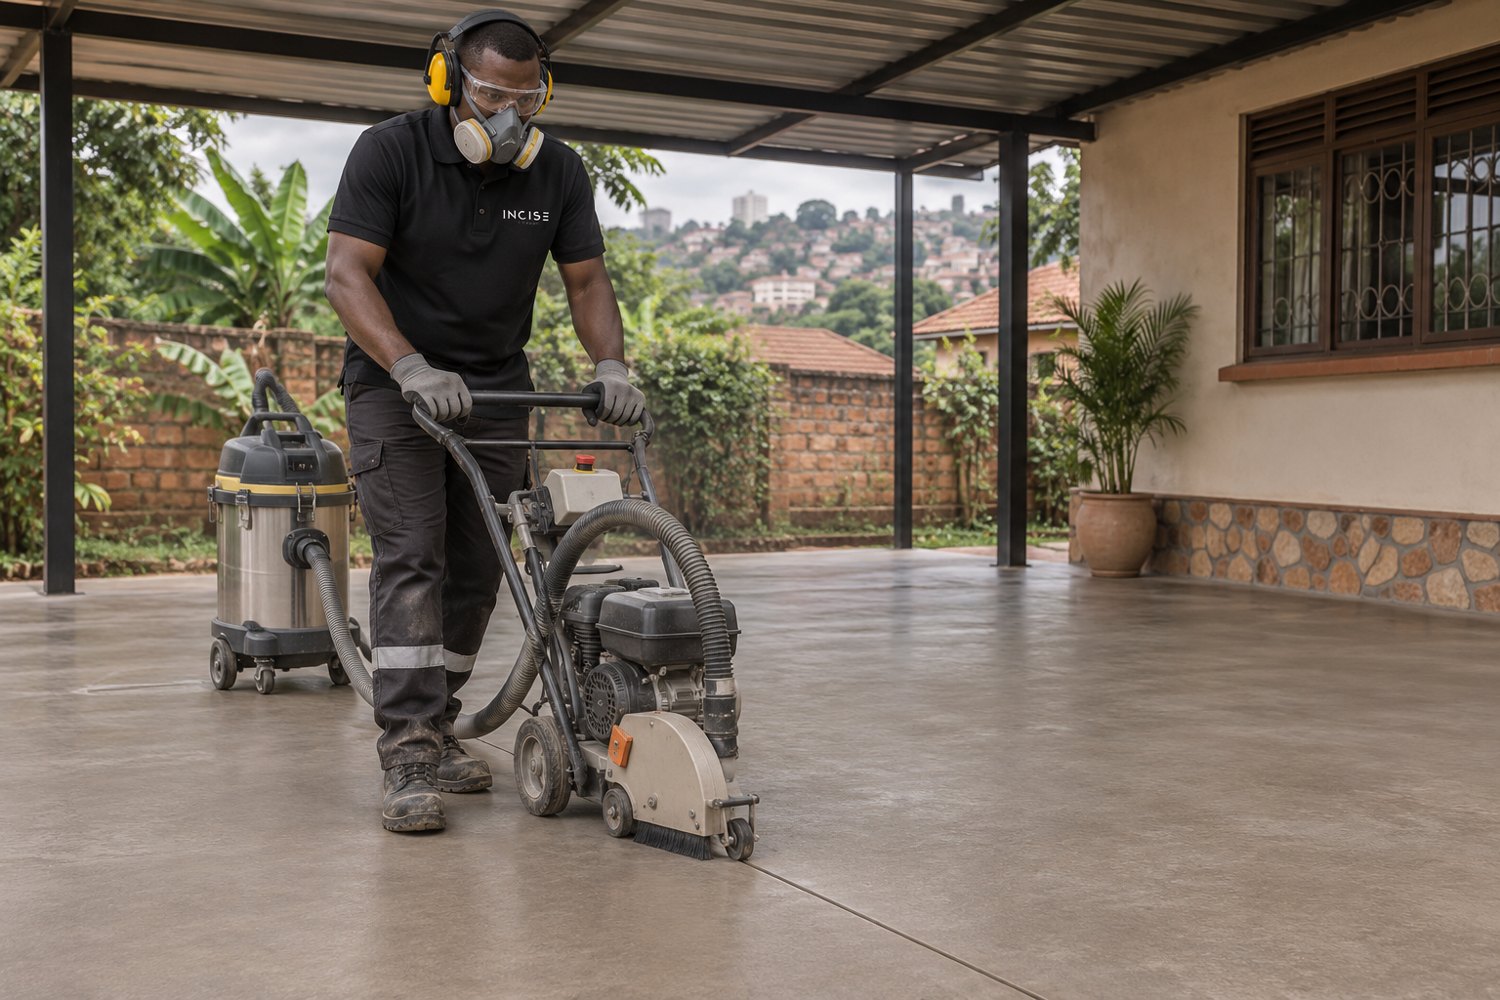
Form or saw the specified contraction joints within the slab-design timing, before uncontrolled cracking occurs. Saw as soon as the concrete can support the operation without unacceptable edge damage. Keep movement and isolation joints functional.

Application detail

Start the approved curing method as soon as finishing permits. Prevent rapid moisture loss and protect against rain, contamination and traffic. Select curing materials compatible with the colour and later densifier and sealer; remove incompatible residues before these treatments. Joint depth, spacing and curing duration follow the concrete specification.

Before moving on: A protected, curing slab with correctly executed joints. Drying alone is not curing.

Applying INCISE Strong densifier
08
After suitable curing and preparation

Densify with INCISE Strong

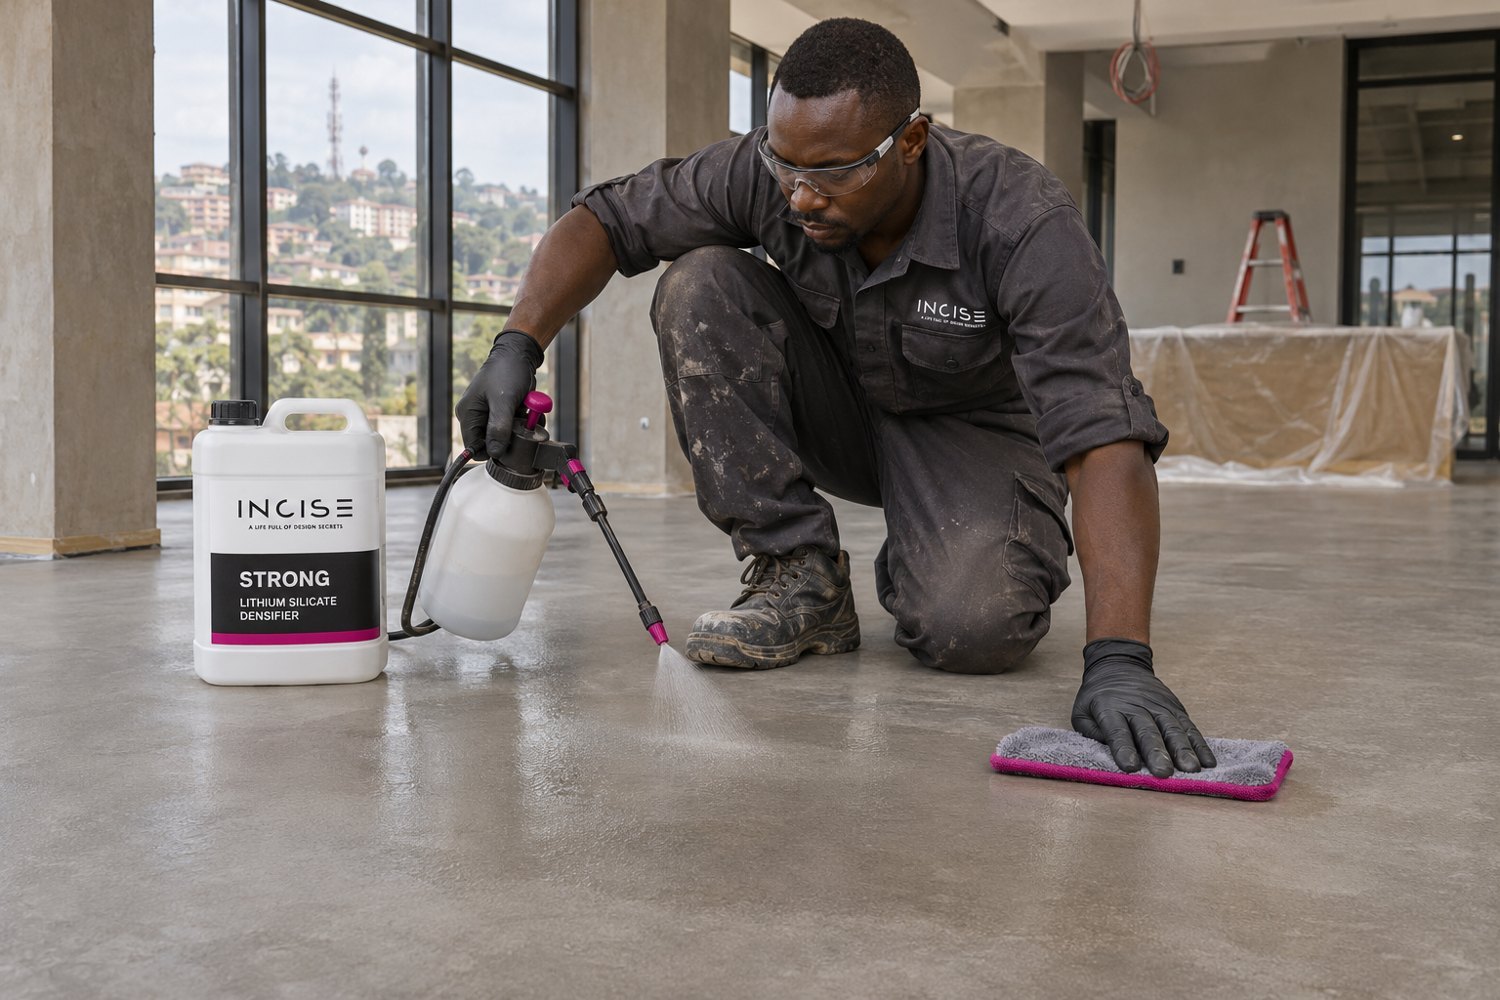
Apply INCISE Strong to the clean, receptive mineral surface according to its current instructions. Confirm substrate age, preparation, application rate and reaction time for the selected densifier.

Application detail

Remove incompatible curing residues first. Work the treatment uniformly and remove excess or residues as directed. Densification supplements the hardener; it does not replace proper concrete curing or the protective sealer.

Before moving on: A uniform, clean surface ready for the selected protection system once its conditions are met.

Roller application of protective sealer
09
Minimum 14 days before sealing

Seal and hand over

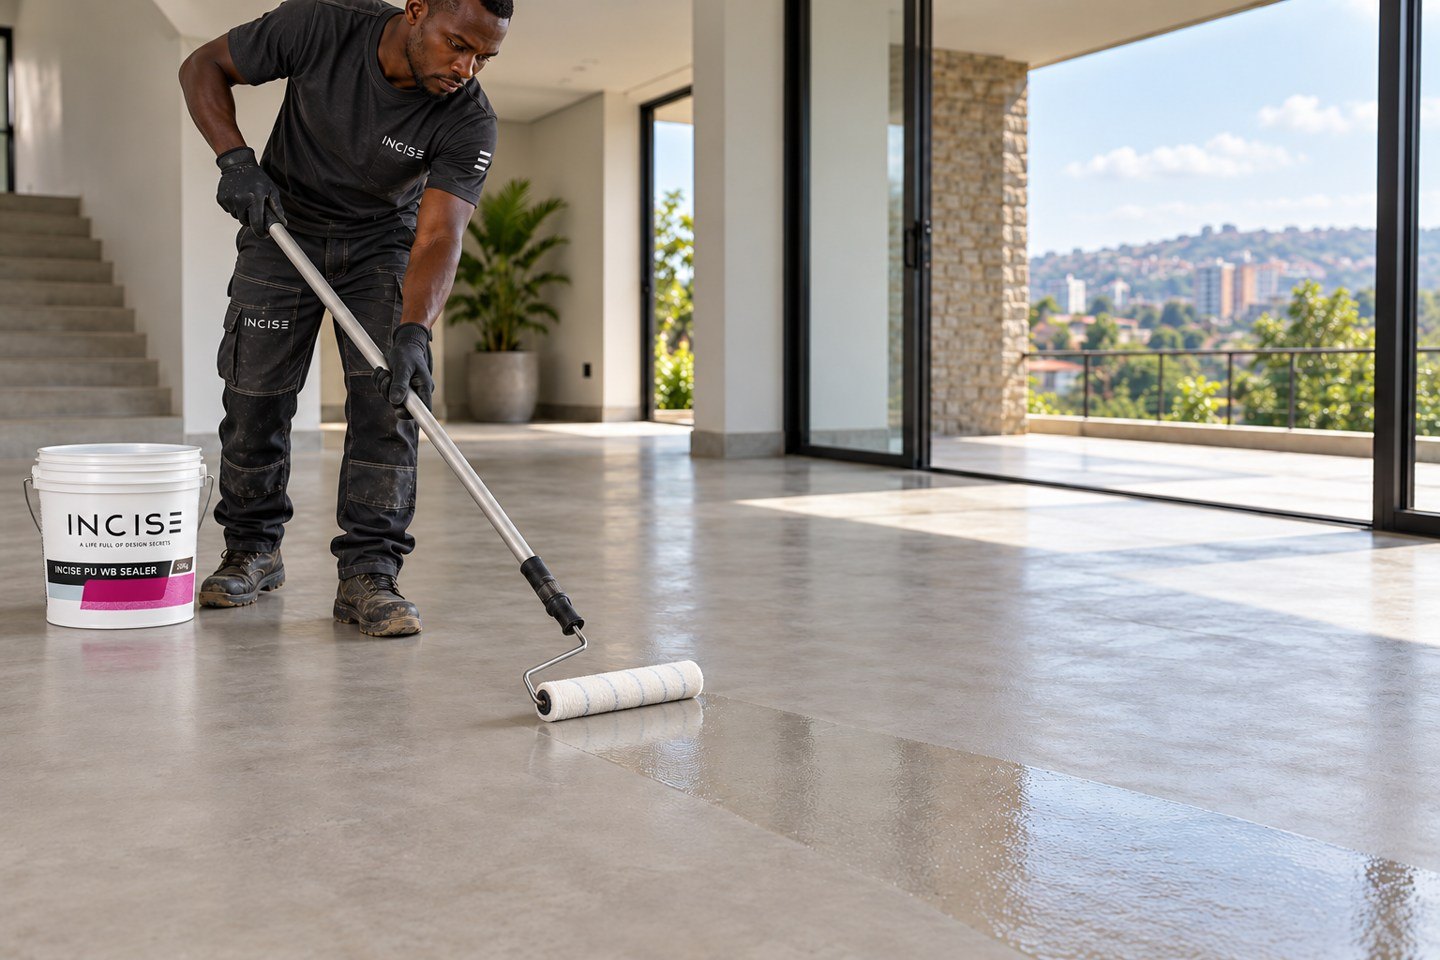
Allow at least 14 days drying before sealing, as specified in the INCISE Colour Hardener TDS. Longer may be needed. Test moisture using the selected sealer’s prescribed method and limit; elapsed time alone is not clearance to seal.

Application detail

Select the INCISE sealer for traffic, exposure and appearance. Apply controlled thin coats and observe its recoat and cure times. Release the floor for traffic only after both concrete and sealer requirements are satisfied. Provide cleaning and maintenance instructions.

Before moving on: Dryness, adhesion and sealer compatibility accepted; joint layout remains functional.

Quick answers

Before the team starts.

Can I apply this onto old concrete?

Not directly by this dry-shake method. A designed fresh screed or topping is required; the supplied TDS specifies a minimum 40 mm screed topping. Have INCISE assess the complete build-up.

Is it suitable for stamped concrete?

Yes. Colour Hardener provides the coloured mineral surface. Release agent, stamps, timing and sealing form a separate coordinated application sequence.

When can I seal?

After at least 14 days drying, and only when the selected sealer’s moisture and substrate requirements are met. Follow the INCISE Strong instructions before sealing.

Does this guide specify the reinforcement?

No. Mesh, reinforcing bars, cover, slab thickness and joint design are determined for the project by the responsible designer.

Plan the complete system

Get the floor right from the pour.

Speak to INCISE Technical resources